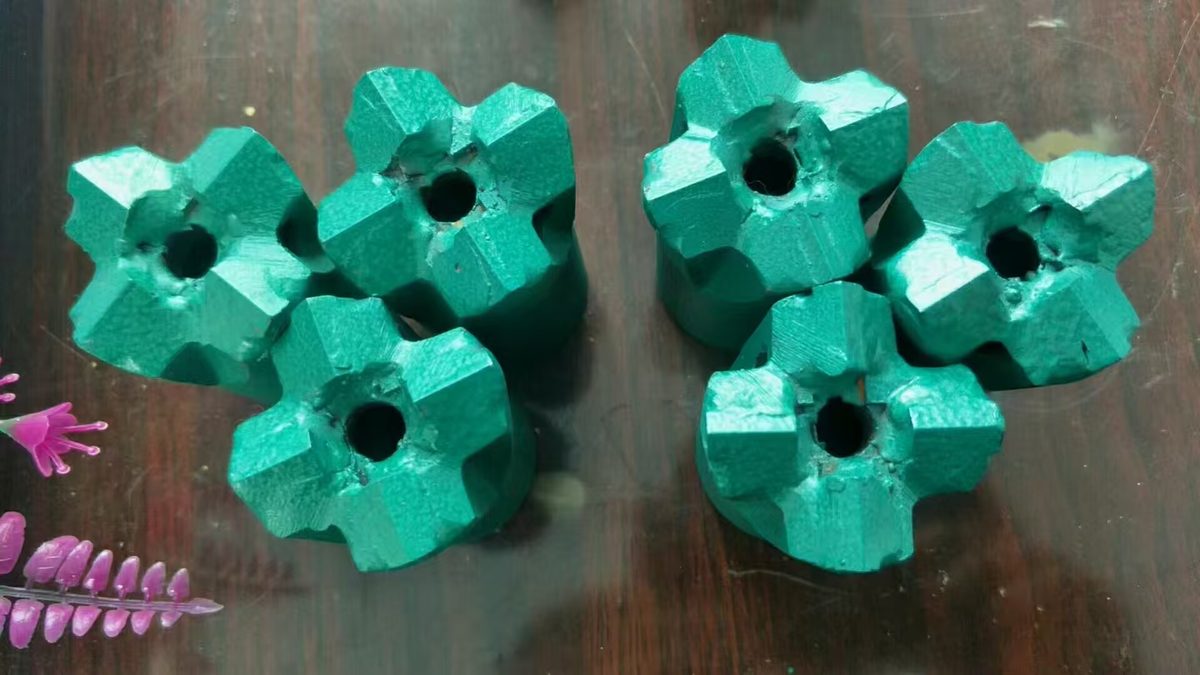
Introduction: Twelve Operations Between Bar and Bit
A blast furnace drill bit may look like nothing more than a “four-wing cross head with a few carbide buttons”, but to make one drill through tap-hole clay for dozens of heats without chipping buttons or snapping wings takes a complete process chain, from material selection to heat treatment. Why the cross form cuts clay the way it does is a geometry question, covered in how cross-type bits chew through tap-hole clay and lining. What follows is the production sequence as it happens on the shop floor.
Step 1. Material Selection: Grade 45 Steel Shell, Tungsten Carbide Buttons
A bit is built from two materials, chosen on very different logic:
- Bit shell (steel body): Grade 45 quality carbon steel (equivalent to AISI 1045 / C45). This is the most common shell material in the Chinese blast furnace bit market. At about 0.45% carbon it is cheap, readily available, easy to machine, and needs little preheat when brazing carbide. After quench and temper, yield strength exceeds 355 MPa, which is more than enough for a bit shell whose job is mainly to support, transmit torque and hold the buttons. On long rods that sit closer to furnace heat, the grade choice carries far more weight, and the reasoning is set out in 42CrMo versus 40Cr for drill rods.
- Cutting buttons: tungsten-cobalt grade cemented carbide (YG series). Hard and wear-resistant, but brittle. These are the parts that actually chew through the clay, and they account for the lion’s share of the bit cost. Grade and grain size selection is covered in tungsten carbide tips for blast furnace drilling.
Incoming steel is checked against mill certificates and hardness-tested; incoming carbide buttons are checked for grade and grain size – fine grain for soft rock, coarse high-toughness grain for hard tap-hole clay. Choose wrong, and bit life halves.
Step 2. Forging the Blank: Shaping the Cross Outline from Round Bar
The process starts by cutting a length of Grade 45 round bar to size. It is then heated and forged on an air hammer or friction press to upset the four-wing rough shape. This step matters: forging aligns the steel’s fiber flow along the bit outline, making the body far stronger than one simply milled from a plain bar. The wing angles and pocket positions this outline fixes are what decide how the finished bit cuts, and they are the subject of cross bit design for the taphole.
The as-forged blank cannot be machined directly – it is stressed and too hard to cut. So it first goes through normalizing or annealing: heat to 840-860 deg C, then cool in still air or in the furnace, softening the body and relieving stress to make turning and milling easy.
Step 3. Machining: Turning the Shank, Milling the Wings, Cutting the Button Pockets
The prepared blank goes to lathes and mills for three operations:
- Turn the shank: turn the outer diameter, end face and central flushing hole in one setup. The shank must match the drill rod thread exactly.
- Turn the connecting thread: cut the trapezoidal or rectangular thread on the shank – the joint that connects to the rod. Tooth form, pitch and taper must match the opening machine and the rod, because even a small mismatch causes leaks or thread stripping. Diameter and length against the rod it will run with are set out in matching drill rods and bits, with the tolerance detail in thread matching for threaded shank bits and rods.
- Mill the cross wings and button pockets: mill the seats that hold the carbide buttons on each of the four wings, and drill the central flushing hole and the side-jet holes. The angle and depth of the pockets directly set the cutting geometry of the brazed buttons, and are a key setup task for the machinist.
Step 4. Brazing the Carbide Buttons: The Step That Decides Bit Life
This is the core step and the riskiest one. Grade 45 steel brazes more easily than alloy steel, but the process still has to be followed:
- Before brazing, sandblast the pockets and the carbide buttons to remove oil and expose fresh metal;
- Pre-place a silver-based brazing foil (common grade BAg45CuZn, about 45% silver) in each pocket;
- Seat the carbide button in the pocket and hold it with a dedicated fixture;
- Use high-frequency induction heating to bring the joint zone quickly to 780-820 deg C so the filler melts and wets the seam;
- Cool slowly under insulation after brazing – never quench, or the carbide will crack.
Joint quality decides whether the buttons stay on: slag inclusions and incomplete fusion mean buttons fly off after a few strokes, while a full, uniform braze fuses the buttons to the shell.
Step 5. Heat Treatment: Quench and Temper the Grade 45 Shell Hard but Not Brittle
After the buttons are on, the Grade 45 shell receives a final quench and temper:
- Quench at about 840 deg C, then water- or oil-quench to build surface hardness;
- Temper at around 500 deg C to relieve quench stress, leaving the shell hard on the outside and tough in the core – a wear-resistant surface over a shock-absorbing core.
Temperature control is critical here. Grade 45 steel is sensitive to overheating: too hot and the grains coarsen and the shell turns brittle, too cold and hardness is low and the wings distort. Experienced operators judge the temper by the temper colour. On large bits, the thread zone can be given an additional surface induction hardening to improve thread wear resistance. What heat treatment and precision machining contribute to tool life overall is covered in heat treatment and precision machining of blast furnace tools.
Step 6. Finishing and Grinding
Heat treatment leaves slight distortion, so the bit goes to the grinder:
- Grind the outer diameter of the four wings so the cross is symmetric and the hole stays straight;
- Grind the button cutting edges to remove brazing flash;
- Re-check that the flushing holes are open and that the thread is not choked by heat-treat scale.
A bit that leaves the shop with an off-centre button or a tramp wing shows up as uneven wear within a few heats, which is the same set of signs described in when to regrind a button bit.
Step 7. Surface Finish and Identification
Finished bits are sandblasted to remove scale, then coated with anti-rust primer. Factories commonly use red, orange and white topcoats as identification – different colours mark different carbide grades, bit diameters or service conditions. Operators on the casthouse floor know at a glance which bit to grab, which is why bits come off the line in rows of different colours. The colour system itself is explained in drill bit colour codes.
Step 8. Final Inspection Before Shipping
Every bit passes several checks:
- Visual: braze seams full, no slag holes, no cracks on the wings;
- Dimensions: outer diameter and thread checked with ring and plug gauges;
- Hardness: shell surface hardness spot-checked, typically HB 220-260;
- Flushing hole: air- or water-tested for leaks;
- Thread: trial-mated with the matching rod, running smooth with no wobble or binding.
What to measure, on what sample size, and what documentation should accompany the shipment is set out in the quality control checklist for blast furnace drill bits and rods, and how the parts are protected afterwards in export packing for drill bits and rods.
Conclusion
From a round bar to a finished bit, a Grade 45 shell blast furnace drill bit passes through material selection, forging, normalizing, turning, milling, induction brazing, quench and temper, grinding, painting and inspection – a dozen or more operations. What really separates one bit from another is not the shape, but three details: the right carbide grade, a sound braze, and accurate quench and temper of the Grade 45 shell. Get these three right and a Grade 45 shell with good buttons delivers real value and long life; cut corners and on site you get chipped buttons, broken wings and snapped bits. The failure modes to watch for once the bit is in service are set out in five common on-site causes of broken bits, and how to write the same three details into an enquiry in price advantage without quality risk.